For Each File
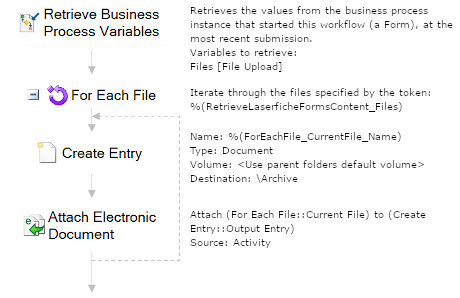
This activity runs the activities inside it on each file in a collection. Generally, you will want to use this activity with a collection of files attached to a Laserfiche Form (retrieved with the Retrieve Laserfiche Form Content activity). See the tokens this activity produces.
Tip: To bring Laserfiche Forms attachments into Laserfiche, place a Create Entry and an Attach Electronic Document activity inside the For Each File activity, and configure the Attach Electronic Document activity to attach the file currently being processed by the For Each File activity to the entry created by the Create Entry activity. ![]() Show me what this looks like.
Show me what this looks like.
![]() How does this activity look in the Designer Pane?
How does this activity look in the Designer Pane?
- Drag it from the Toolbox Pane and drop it in the Designer Pane.
To configure this activity
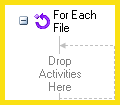
Drag and drop activities into this activity.
Select the activity in the Designer Pane to configure the following property boxes in the Properties Pane.
-
 Activity Name
Once added to a workflow definition, the default name of an activity can be changed. Providing a custom name for an activity helps you remember the role it plays.
To name an activity
- Add an activity to your workflow by dragging it from the Toolbox Pane and dropping it in the Designer Pane.
- Select the activity in the Designer Pane.
- Under
 Activity Name in the Properties Pane,
replace the default name.
Note: Activity names cannot be the same as any other activity name in the workflow, they cannot be the same as the workflow's name, they must be less than 100 characters, they must contain at least one alphanumeric character, they cannot be "Name," and they cannot be the same as the activity's runtime type (which is usually only an issue with custom activities).
-
 Activity Description
Use the Activity Description to provide descriptive text to help you remember the role that the activity plays in the workflow. All activities contain a default description that you can modify while constructing your workflow.
To modify an activity description
- Add an activity to your workflow by dragging it from the Toolbox Pane and dropping it in the Designer Pane.
- Select the activity in the Designer Pane.
- Under
 Activity Description in the Properties Pane, replace the default description.
-
 Files
Files
Use this property box to specify which files the For Each File activity will run on.
To configure files
- Add the For Each File activity to your workflow definition by dragging it from the Toolbox Pane and dropping it in the Designer Pane.
- Select the activity in the Designer Pane.
- Under
 Files in the Properties Pane, select which type of files you want to run the activity on.
 - File Collection: If you want to run the For Each File activity on a file collection, specify a file collection by clicking the Token button (right arrow)
 . Only folder collection tokens, such as attachments to a Laserfiche Form will appear in this token menu.
  Windows File Directory: To run this activity on a collection of files stored on the Workflow Server machine, specify the file path for the collection. Click the Token button (right arrow)
  .
.- Optional: Select Include subfolders to include the files inside any folders in the file collection.
- Optional: Select Only include files like to only include files that match certain criteria (e.g., to only include XML files you would use *.xml).You can add an asterisk "*" to extend your search term so it includes zero or more unspecified characters and/or a question mark "?" to extend your search term by zero or exactly one character. These are the only two variables allowed in this search. Learn more about this type of search on MSDN.
Note: This activity will not enumerate hidden subfolders, hidden files, or system files.
Note: You must have file browsing enabled in the Workflow Administration Console to browse for a file on the Workflow Server local disk.


